Pay
Employee pay details are required in this section. Employees can have either a Gross Annual Salary with their weekly contracted hours and the system will work out the hourly rate when needed, or input the hourly rate here.
Prerequisites
Rules and Guidelines
- Fields that are marked with red asterisks (*) are mandatory.
- Employees can be set to zero for zero hour contracts but will warn you to make sure this is not an oversight in the data entry.
Field Information
This field displays the employee's ID number.
This field displays the employee's surname.
This field displays the employee's first name.
This field displays the employee's basic pay type:
| Code | Description |
|---|---|
| A | Annual Salary |
| B | Basic Rate |
| C | Other |
This window is displayed when you select the 'Annual Salary' option in the "Basic Pay Type" field and then click the 'New Basic Pay' option.
Enter the employee's contractual annual salary to a maximum of '999999999.99'. This field is used to calculate the employee's period salary and hourly rate when used in conjunction with the 'Weekly Basic Hours' field and Annual Salary 'Start Date'.
Enter the number of contractual hours an employee works in a normal working week. The field is for numeric characters only with a range of hours from '1' to '99.99'. If the annual salary is entered,
This read-only field has a value of '0' when you select 'Annual Salary' or 'Hourly Rate' as the type of pay. When you select the 'Other' option, this field will be greyed-out.
This window is displayed when you select the 'Basic Rate' option in the "Basic Pay Type" field and then click the 'New Basic Pay' option.
This field displays the pay code attached to the employee.
This is the daily rate applied to the pay code.
If the employee is to be paid an hourly rate rather than a salary, enter an hourly rate. The payroll use the details in this field to pay the hours every pay period.
Select 'Yes' to pay the hours and rate automatically each period. Otherwise, select 'No'.
The stop marker is displayed here for ay added data entered against the employee pay codes.
This field displays the employee's annual salary.
This field displays the date when the pay change will be effective.
Note that the value of this field:
- Cannot be beyond the current pay period
- Cannot be before the beginning of the last record's End date
- Cannot be before the employee's Start date
- Cannot be before the Effective Date Switch-on Date (for Option A, 1, 7, 3)
If the employee's annual salary is to be removed and therefore paid zero, do not enter a zero record on the employee but simply enter the date in this field that the salary is due to end.
Note that the value of this field:
- Cannot be before the Start date of the selected record
- Cannot be before the Start date of another record
This field displays the employee's basic hours.
The value of this field is calculated when you select Save.
Link
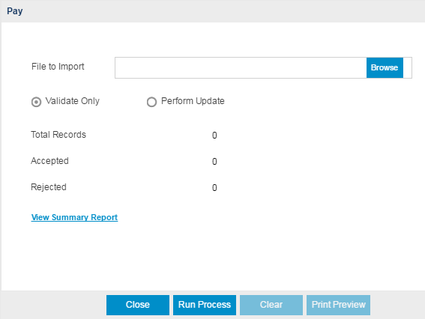
If you would rather import the data from a spreadsheet, you can download our template by selecting this link. If it is the first time you have added any data, then a dummy row will be displayed to help you. If you already have data, then that data will be downloaded to enable you to update it as well as add new data. You will need to remove the dummy data entered in the spreadsheet before import.
Although the file will open in Excel, it is important that it is saved as a CSV (Comma Separated Values) file. Otherwise, the import will not be completed.

Upload will allow you to browse to the downloaded file and bring it in to the system.

You can either perform a validation or update the system once the file is located using the Browse option.
- Validate will advise you if you have any issue with the file before importing, enabling you to change the data. Select this option to test the format of the file and fields.
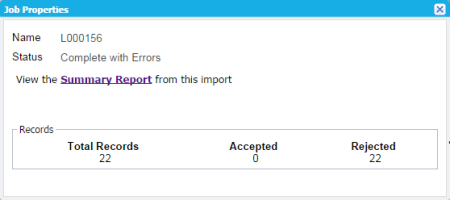
After running the Validate Only process, the system will produce a report detailing that the update is completed, and if there were errors encountered during the validation. The detailed information is shown in the Summary Report.

- Perform Update will upload the data and display it in the Pay page of the Wizard for you to confirm by moving Next. Select this option to upload and update information in your database.
Select Next >> to continue with the workflow.
Click this link --> Setup Wizard if you want to go to the Wizard's Help.