Navigating Moorepayhr
The Modules and screens you have access to are displayed on the Navigator at the left hand side of the window. These options vary depending on your setup and the security privileges granted to you.
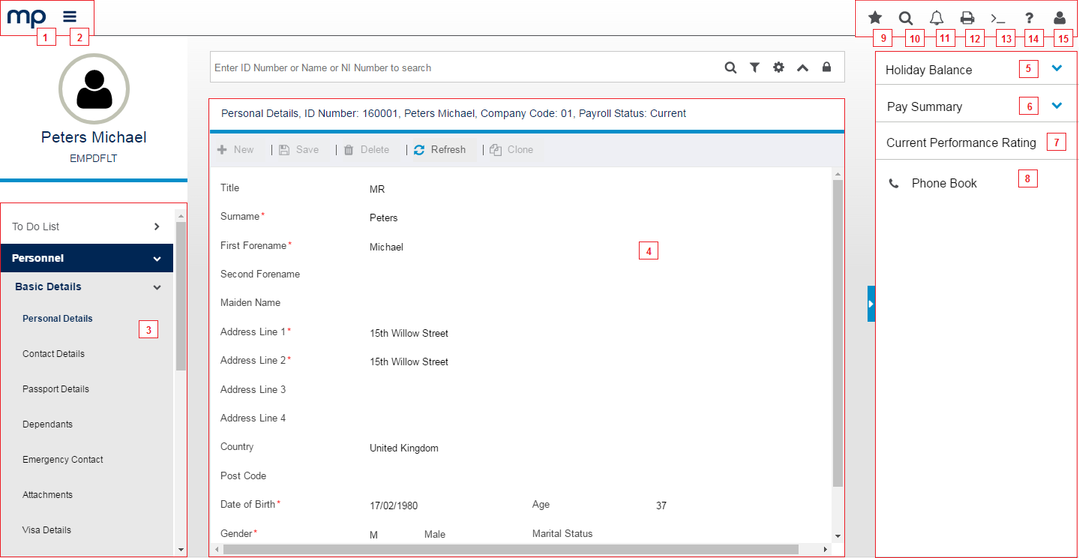
Top Left Items

This icon at the top left portion of the screen is the Home Page button. Once you click on this button, the Home Page is reloaded.
This icon enables you to display or hide the menu items. Clicking this open the Navigator.
Main Menu
This section on the left side of the screen gives you the list of Modules that are available for your use (according to the access granted to you). Clicking a Module (e.g. Payroll), displays another list containing the folders and screens under the selected Module.
Main Window
The data entry region is where your selected Module displays the content of your selection. Here, you can update your existing record, depending on the access profile linked to your account.
Once data has been entered and saved, or refreshed, a message in neon green background appears at the top of this Data Entry section.
Widgets
This widget displays the number of days you are entitled for a Holiday as well as the number total leaves taken and the remaining Holidays.
This widget tells when the Pay Date is as well as shows the Gross Pay, Deductions, and Take Home Pay.
This reveals the Performance Rating Description of the latest record from the Completed Performance Forms.
This serves as the employee directory. When the Phone Book widget is clicked, a Search panel which can filter the employee name, position, and department is displayed (i.e. any matching text entered in the Search box are displayed in the columns below). The employee's contact details will be loaded on the panel when a record is selected from the Search results list.
When the Phone Book is accessed via tablet or mobile device, you can dial an employee's work phone and mobile numbers by clicking the corresponding links. The link on the employee's business email address will also open the default mail application (e.g. Office 365, Gmail, etc) on a PC, tablet, or mobile device when clicked.
Top Right Items

At any time this star icon is selected, the Navigator will be replaced with the screen that the you have selected as a “favourite”. Selecting the three-bar icon at the left portion of the screen will reload the Navigator.
This magnifying glass icon functions the same as the [Ctrl + Q] key which enables you to quickly search for any screens.
This bell icon loads the Notifications side window containing Inbox messages and other alerts.
This icon allows you to print the current page you are in.
This icon gives you a list of options: Debug Screen and Debug Search.
The question mark icon represents the User Help which presents the Knowledge Base Content link and About.
This rightmost image at the top of the screen is the Employee’s attached photo. Once clicked, this drops down various options (e.g. Username, Group the User is logged in to, Personalisation, Change Password feature, and Log out).